VEGGIE & CHICKEN PAD THAI


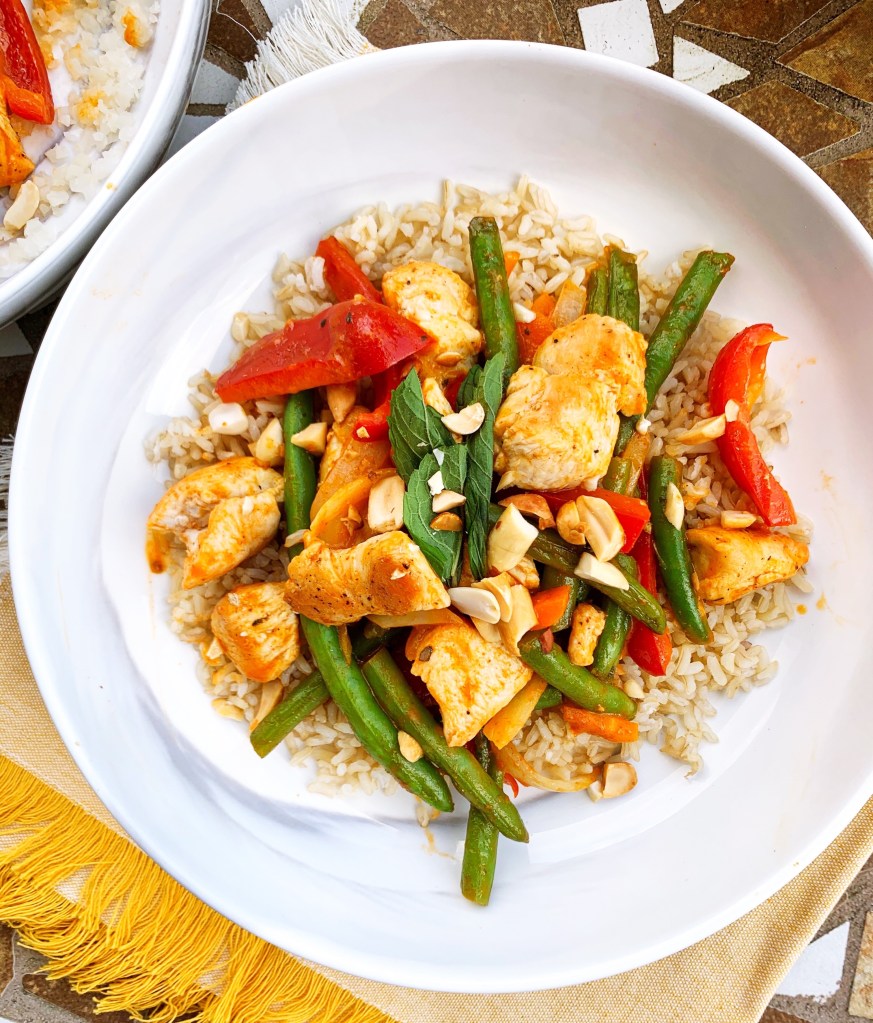
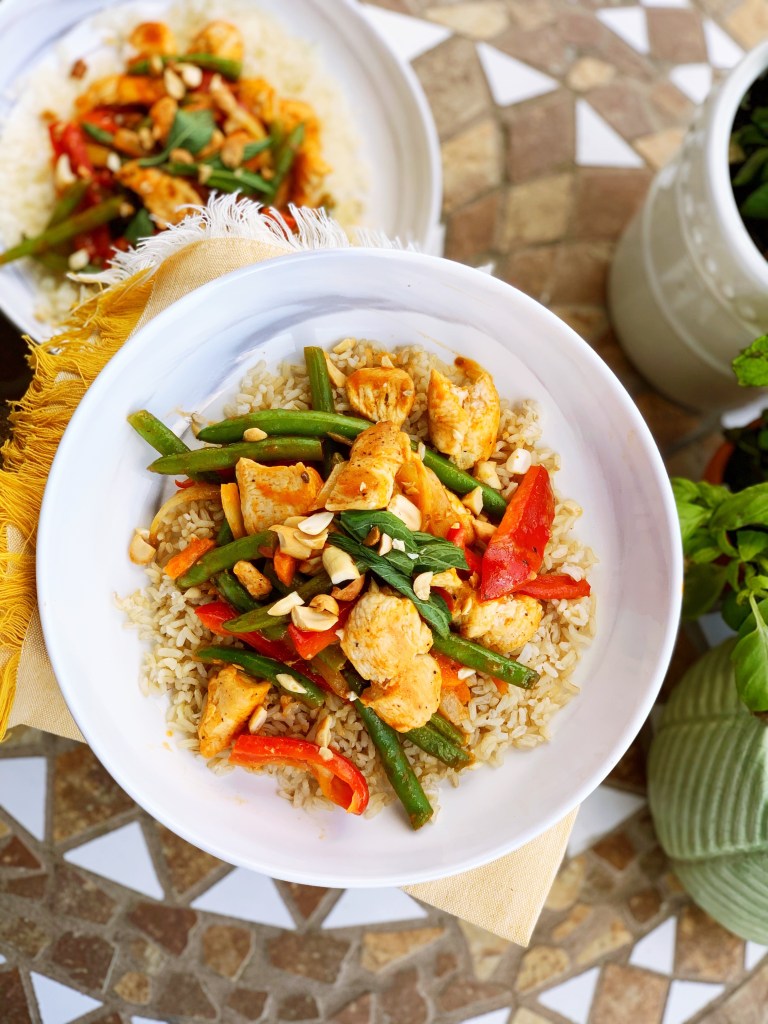
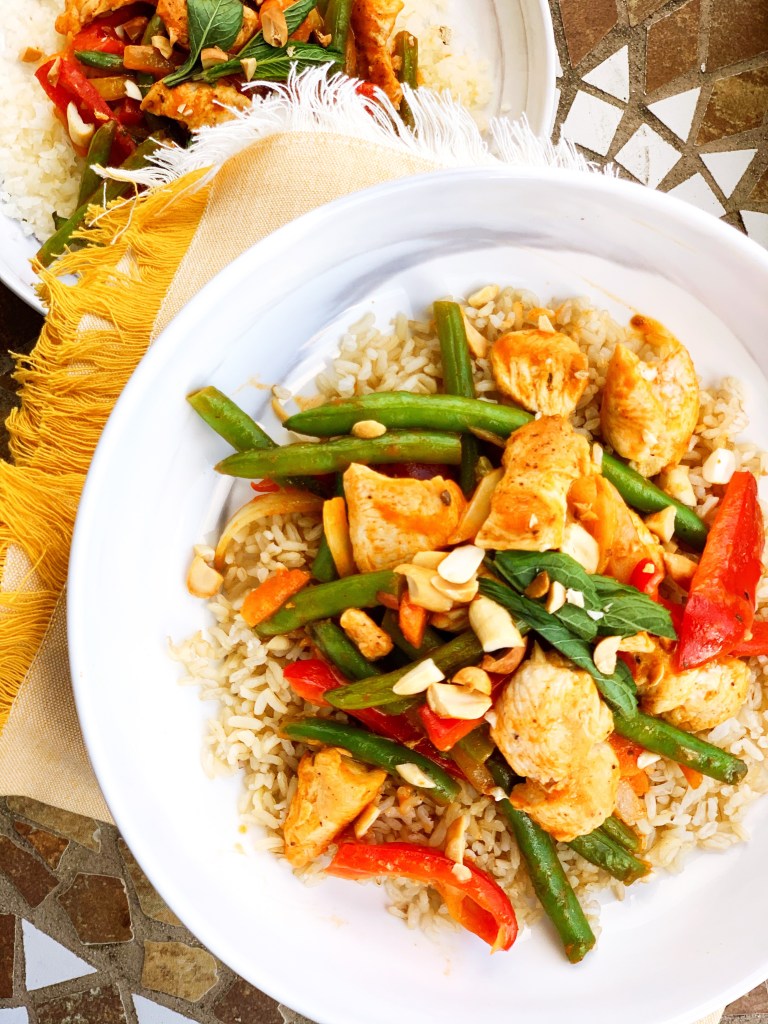
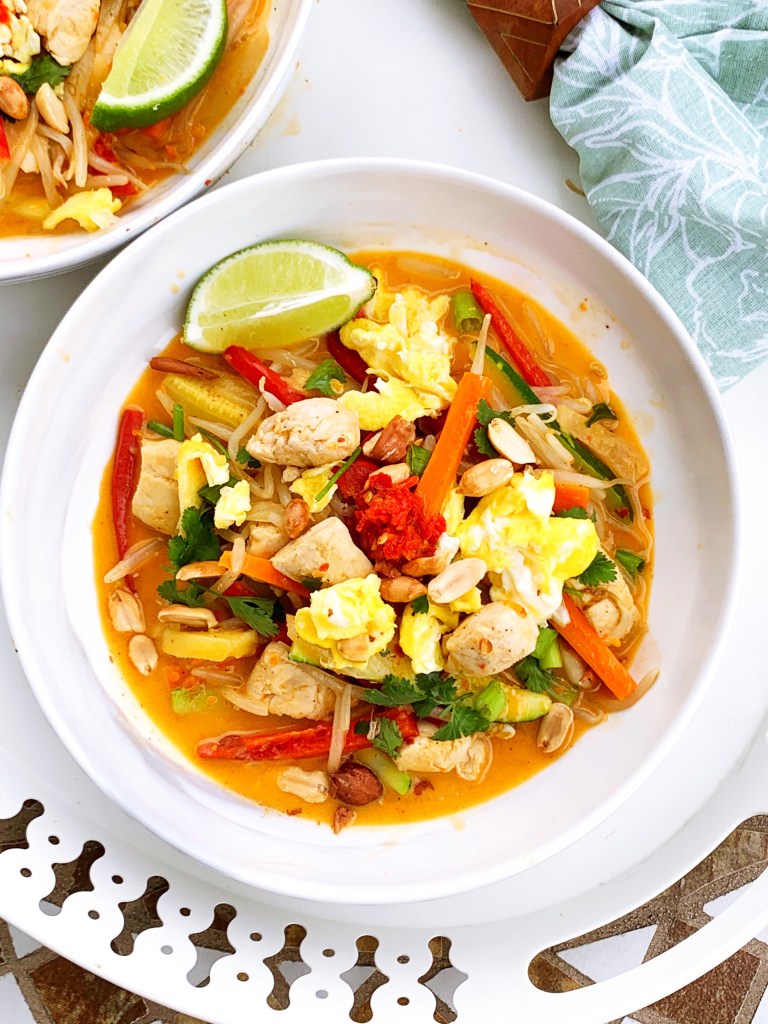
Tonight I recreated one of my favorite dishes, Pad Thai. I was feeling like having something a bit lighter so I subbed noodles for bean sprouts and other colorful veggies. I used “A Taste of Thai”, peanut sauce mix and coconut milk to make the flavors come to life. It is not spicy, so it works for anyone! (I added in extra red pepper to kick the spice notch up). Sooo, Mark is not a veggie guy, so he also wanted Thai and ordered Pad See Ew from our local Thai spot. Truth be told, he devoured BOTH meals. He actually loved mine, especially the peanut crunch. This was a great nutritious and light meal to enjoy on our little patio on this gorgeous Sunday night. Want to add some more carbs? Have a side of coconut white rice…YUM (def doing that next time). I hope you enjoy this recipe, let me know what you decide to pair it with!
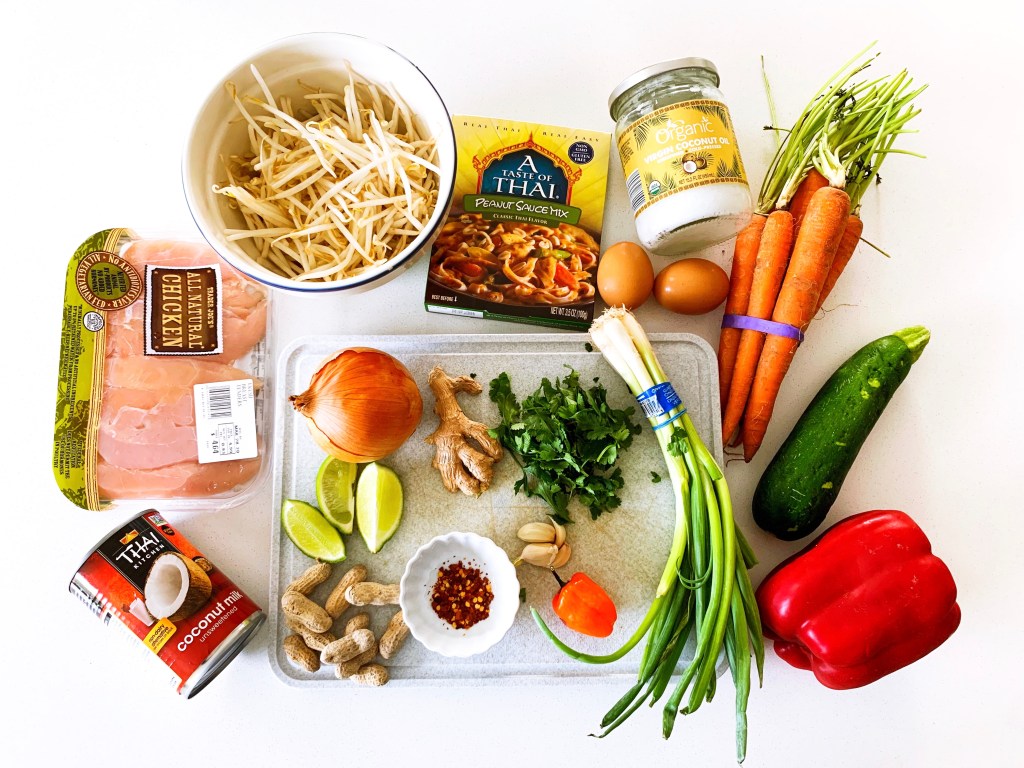

Ingredients

  • Thinly sliced chicken breasts, cut into bite sized pieces
  • Taste of Thai, peanut sauce
  • Taste of Thai, coconut milk
  • 1 bag of bean sprouts
  • 1/2 yellow onion sliced tin
  • 3 large carrots, sliced thin
  • 1 small zucchini, sliced thin
  • 1 red bell pepper, sliced thin
  • 3 garlic cloves, crushed
  • 2 eggs, scrambled
  • peanuts, crushed
  • cilantro,chopped
  • chives, chopped
  • red pepper flakes
  • limes

*For a heartier meal, add white or brown coconut rice on the side, YUM.

Directions

  • Prepare all your veggies by slicing them thinly and set aside.
  • Simmer your coconut milk in a large saucepan on medium heat for 2 minutes and then add in your chopped chicken breasts, garlic and peanut sauce and saute for 5 minutes.
  • Add all of your sliced veggies in and continue to cook all together on medium heat for about 5-7 minutes.
  • While everything is cooking, in a small pan, scramble two eggs.
  • Serve the veggie and chicken Pad Thai in a bowl, add the scrambled eggs, crushed peanuts, cilantro, chives, red pepper flakes and a squeeze of lime.

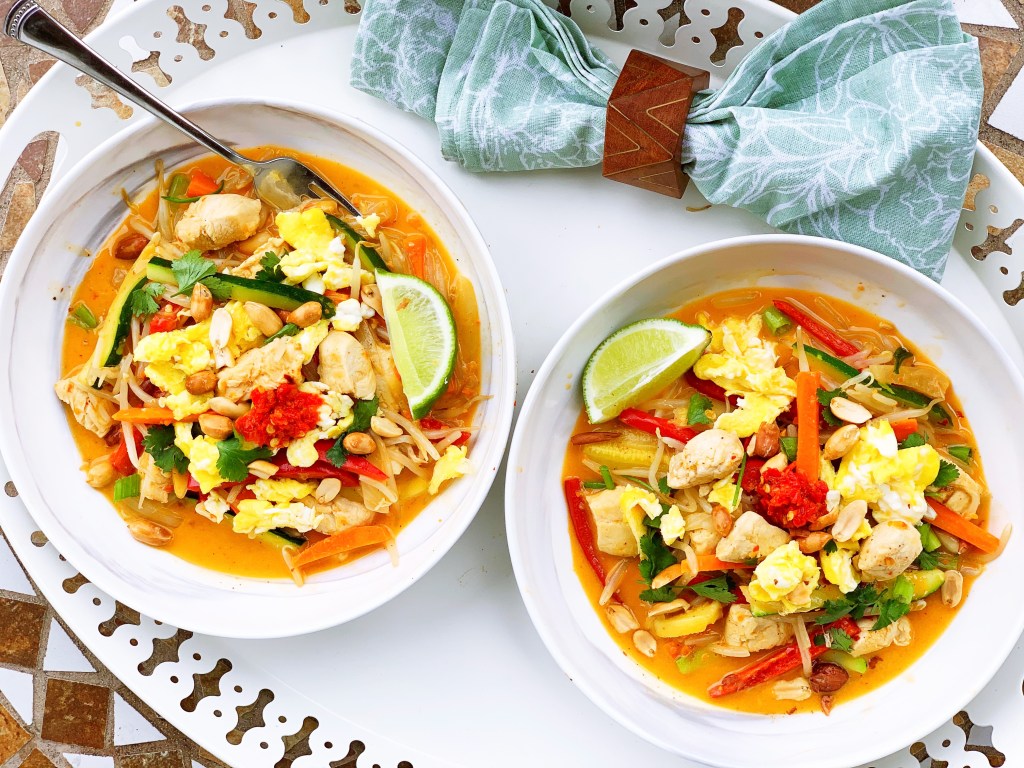
I hope you enjoy this flavorful Thai inspired recipe! This would be a great one to add into your weekly meals for the upcoming week. Let me know what you think and tag me on instagram if you make it, I would love to see it! Stay healthy & safe this week.

xo Jamie

HOMEMADE ICED COFFEE. EVERYTHING YOU NEED TO KNOW.

If you follow me on instagram or know me in real life, you know I have a slight addiction to iced coffee. Dunkin iced coffee, Starbucks iced coffee, cute coffee shop iced coffee and really anything that involves coffee and ice. I will tell you, my number one pet peeve is when a place tries to give me hot coffee over ice and call it iced coffee. I GO NUTS. DO NOT DO THAT. I REPEAT, DO NOT DO THAT. Due to #stayinghome, I started making my own iced coffee with my fave kitchen aid cold brew maker my mom got me as a gift, two years ago. I will be honest, I did not use it much up until now- but now I can’t stop. It’s practical and now I have my own coffee shop iced coffee served straight from my kitchen. I make it nice and creamy with almond milk creamer or regular creamer with a dash of my favorite syrup, Torani- sugar free vanilla bean. I am going to share a little bit about each product, that I use to make the most delish cup of creamy iced coffee every morning. Oh did I mention, I have an entire amazon store dedicated for iced coffee everything, you must check it out! Let’s get into each step to make the most epic glass of iced coffee.

Continue reading “HOMEMADE ICED COFFEE. EVERYTHING YOU NEED TO KNOW.”

LOADED BEEF EMPANADAS

Where do I even begin with these loaded beef empanadas. Let’s just say for the ultimate taste explosion experience, enjoy them straight out of the oven! WOW. I was inspired by my friends, Veronica and Lisa, when they did a joint face time empanada making session last week, they looked incredible! Veronica and Lisa are my college friends, and one time they visited my hometown and I brought them to “the best empanada place”, it was a tiny gas station in the middle of nowhere, and yes they had the best empanadas. Sooo, let’s just say after I saw them eating them, I needed to try to recreate these “gas station empanadas”. I swear sometimes the hole in the wall places are the best. These were surprisingly easy! I used goya discos, found in the freezer section and made up my own filling. You can honestly substitute anything in the filling to your liking. Also, I have never flash fried anything before- I was imagining oil flying everywhere, but it was much calmer and easier than I thought! I can’t wait until Mark comes home from work, because I am pretty sure this is making his top 3 of my dishes. Enjoy!


Ingredients

  • Goya Foods, Empanada Discos, 10 (defrosted)
  • 1 lb of ground beef (you can use protein or veggie of choice)
  • 1/2 of a yellow onion, chopped
  • 1/4 cup of chopped pimento stuffed green olives
  • 3 garlic cloves, crushed
  • 1/2 tablespoon of paprika
  • 1/2 tablespoon of cayenne pepper
  • 1/2 tablespoon of oregano
  • Salt & Pepper
  • 1/2 Cup Mexican shredded cheese
  • Cilantro
  • Vegetable oil (for frying)
  • Sauce of your choice (I used Italian Hot Pepper Bomba Sauce)

Directions

  1. Make your filling. In a saucepan on medium heat, add garlic and onions and saute for 2 minutes. Add ground beef and seasonings, cook until browned. Add in the chopped olives and mix together. Put your filling aside.
  2. Lay out your empanada discos and place about a 1/2 cup of the beef filling on one side of each circle. Add your cheese and cilantro and close the disco by folding together and ensuring it is sealed.
  3. In a saucepan on high heat, fill with vegetable oil the height of the empanadas. Heat for 5 minutes to make sure it is really hot.
  4. Drop 2-3 empanadas into the saucepan and heat for less than one minute on each side until crispy (eye this and don’t walk away). Use a slotted spoon or tongs to grab them and place on cooling tray placed over a paper towel.
  5. Serve hot, with a sauce of choice and garnish with cilantro, ENJOY!


I hope you enjoy these, I know you will! Tag me on instagram if you make them so I can see! I can’t wait to see how you decide to make them. They are for sure the first thing I will make when we’re allowed to have gatherings again, this is a CROWD PLEASER for sure. Stay safe & healthy!

xo Jamie

Red Curry Chicken Bowls

Hi guys! This week I am determined to make some yummy hearty meals for us (and you!) Mark’s mom is so cute and when we visit her to say hello, she gives us brown rice (let’s just say we have about 30 pounds now, I am not even exaggerating). So, I figured let’s take out our rice maker and make some brown rice! Mark taught me how to do it like his mom and he said I did great! We wanted something filled with spice and flavors, so I used Saffron Road-Red Curry Sauce to make this meal! I added lots of veggies, chicken and some peanuts for a crunch. SO GOOOOOOD. It is not TOO spicy, so if you want you can add some hot peppers, but it was the perfect amount of spice and comfort you want from a weekday dinner.


Ingredients

  • Saffron Road-Red Curry Sauce (or something similar)
  • Two chicken breasts
  • 1 cup of fresh green beans, cut in half
  • 1 large red pepper, sliced
  • 1/2 yellow onion, sliced
  • Brown rice, white rice or cauliflower rice
  • Crushed peanuts (optional)
  • Mint (optional)

Directions

  1. Chop up the chicken into bite sized pieces and saute with olive oil, salt and pepper in a large sauce pan on medium heat.
  2. After about 5 minutes, add in the green beans, peppers and onions. Saute on medium heat for another 5 minutes.
  3. Lower the heat to low and add in the Red Curry Sauce. Cover with a lid and simmer on low for 5 minutes.
  4. Prepare your bowls with brown, white or cauliflower rice.
  5. Top your rice with a portion of the red curry chicken and veggies. Garnish with crushed peanuts and mint.

*You can substitute any veggies or protein to your liking. Tofu would be delicious!


This is the perfect easy week night dinner. This took a total of about 20 minutes. (I made the rice in the rice cooker that morning and heated up my cauliflower rice in the microwave). I cant wait to try more of their sauces, as they brought so much flavor to the dish! Tag me on instagram if you make this dish! YUMMM.

xo Jamie


Nana’s Apple Pan Doudy

Okay, okay this is probably more appropriate for Fall, but I really don’t think it matters anymore. I wanted to make another Nana recipe and this was the other one she gave me. This is “Apple Pan Doudy”, the original is baked in a large loaf pan, but I wanted to put a Jamie twist on it and make them mini. I was reading the recipe card Nana gave me and realized she forgot to add the sugar & eggs, so I called her by phone and she step by step took me through this recipe, which was actually more fun! She read me the correct recipe and I wrote it all down for you! So, I like to eat mine with butter and drizzled honey on top, but if you ask my dad- his way is warmed up with vanilla bean ice cream and whipped cream ( I will def be trying that with the rest of them!) I hope you enjoy them, they are oh so comforting!

Continue reading “Nana’s Apple Pan Doudy”